|
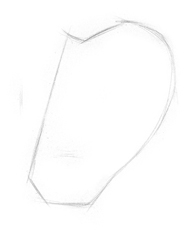
1. Start with the biggest shape of the helix and earlobe. Remember the “?” shape. Get the width to height
relationship working so that the ear doesn’t end up too narrow or too wide. Also measure the angle of the ear. It’s
usually tilted back slightly towards the top.
|
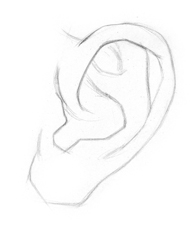
2. Now I’ll focus on the complex shapes inside the ear. Make sure to consistently compare shapes to the
shapes around it. Keep checking angles and the size relationships of the shapes. Breaking up the curves into segments of straights
makes it easier to design and draw accurately. It’s ok to exaggerate shapes if you think it will make for a better design.
|
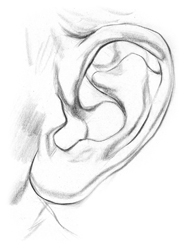
3. Begin mapping the core shadows and cast shadows. Stay true to the simple shapes you’ve established
in the previous step, but add a bit of complexity by varying your line width. Also, try not to oversimplify the core shadows.
Look for variation in the edges.
|
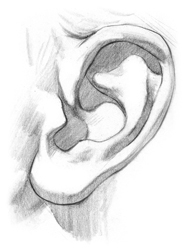
4. Separate the lights from the shadows. Stay simple and don’t lose control of your values. Try to ignore all the
dark halftones and only fill in the shadows.
|
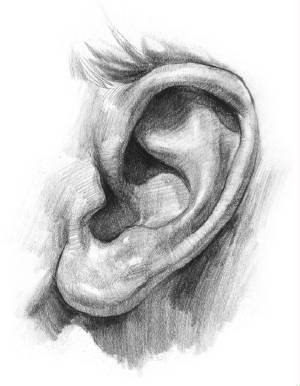
5. During the final stage, I’ll add all the halftones, dark accents and reflected light information. Most of
the volumes in the ear should be shaded like organic cylinders. Make sure these volumes feel round.
|


